Stop making the beginning the difficult part.
Somewhere in Britain, a perfectly sensible person is building a little pyramid of charcoal, feeding it scraps of paper, blowing into it like an exhausted blacksmith and wondering why the barbecue won't get going. Twenty minutes later the middle is blazing and everything around it is still black. By the time dinner starts, the guests have begun developing opinions about ordering a pizza.
A chimney starter solves most of that nonsense. It's a metal cylinder with a grate near the bottom and holes that let air come up through the fuel. Put a small fire underneath, load the top with charcoal and let the rising heat light the pieces above it. That's the entire trick. No carefully stacked pyramid, no liquid lighter fluid and very little ceremony.
It won't teach you when a steak is done or how to control a kettle barbecue. But it gets properly lit charcoal into the barbecue with a good deal more consistency, which makes learning everything else considerably easier.
A chimney is an air supply with a handle.
Charcoal burns well when oxygen can reach it. If you pile pieces together haphazardly, the bits near the ignition point may catch while the rest sit there absorbing smoke. The chimney holds the fuel in a tall, ventilated column. Hot air rises; fresh air enters below; the heat carries into the charcoal above. It's not magic, just a useful shape.
Most full-size starters have a lower compartment where a little fire can burn and a larger upper chamber that takes the charcoal. They work with ordinary food-grade lumpwood and briquettes. Lumpwood varies more in size and can send sparks about when poured; briquettes generally stack more consistently and can give a more predictable burn. Neither needs to be 'self-lighting'. In fact, Weber specifically advises against using self-lighting charcoal in its chimney starter.
A small starter can be handy for a portable grill or topping up a longer cook. For an ordinary family-sized kettle barbecue, a standard chimney is more versatile. Buy one with a solid heat-shielded handle, a secure grate and a shape you can pour from confidently. This isn't an area where an elaborate digital gadget earns its keep.
How to light charcoal with a chimney starter.
Before you open the charcoal bag, decide where the lit coals are going. For most cooks you'll want a direct zone and an area without coals underneath. There is little point lighting an excellent chimney of charcoal and then discovering that you've left nowhere to move the chicken when its skin begins to blacken.
- Set up outdoors. Remove the cooking grate and stand the chimney securely on the barbecue's lower charcoal grate, as its manufacturer directs. Keep it away from awnings and anything combustible. Never light a chimney on bare concrete; trapped moisture can expand when heated and cause cracking.
- Add the charcoal. Pour fuel into the upper chamber. Half-full is absolutely fine if you're cooking a small meal. Shake it gently so pieces settle without packing them tight; you need space for air to pass through.
- Light the starter fuel. Place one or two suitable solid firelighter cubes beneath the chimney, or use loosely crumpled newspaper in the lower compartment if your starter is designed for it. Light the fuel through the lower vents. Follow the firelighter instructions and don't add lighter fluid.
- Give it air, and leave it alone. Flames will work upwards through the charcoal. The lower pieces catch first; the upper pieces gradually heat and ignite. There is no useful reason to keep picking the chimney up to see whether it's working.
- Watch the top, not just the clock. A common guide is around 10–15 minutes, but wind, fuel size, dampness and chimney design change the timing. Look for the upper pieces beginning to grey with ash and showing that they are catching. If you're preparing a gentler, longer fire, the manufacturer may advise an earlier pour; follow the cooker and fuel instructions.
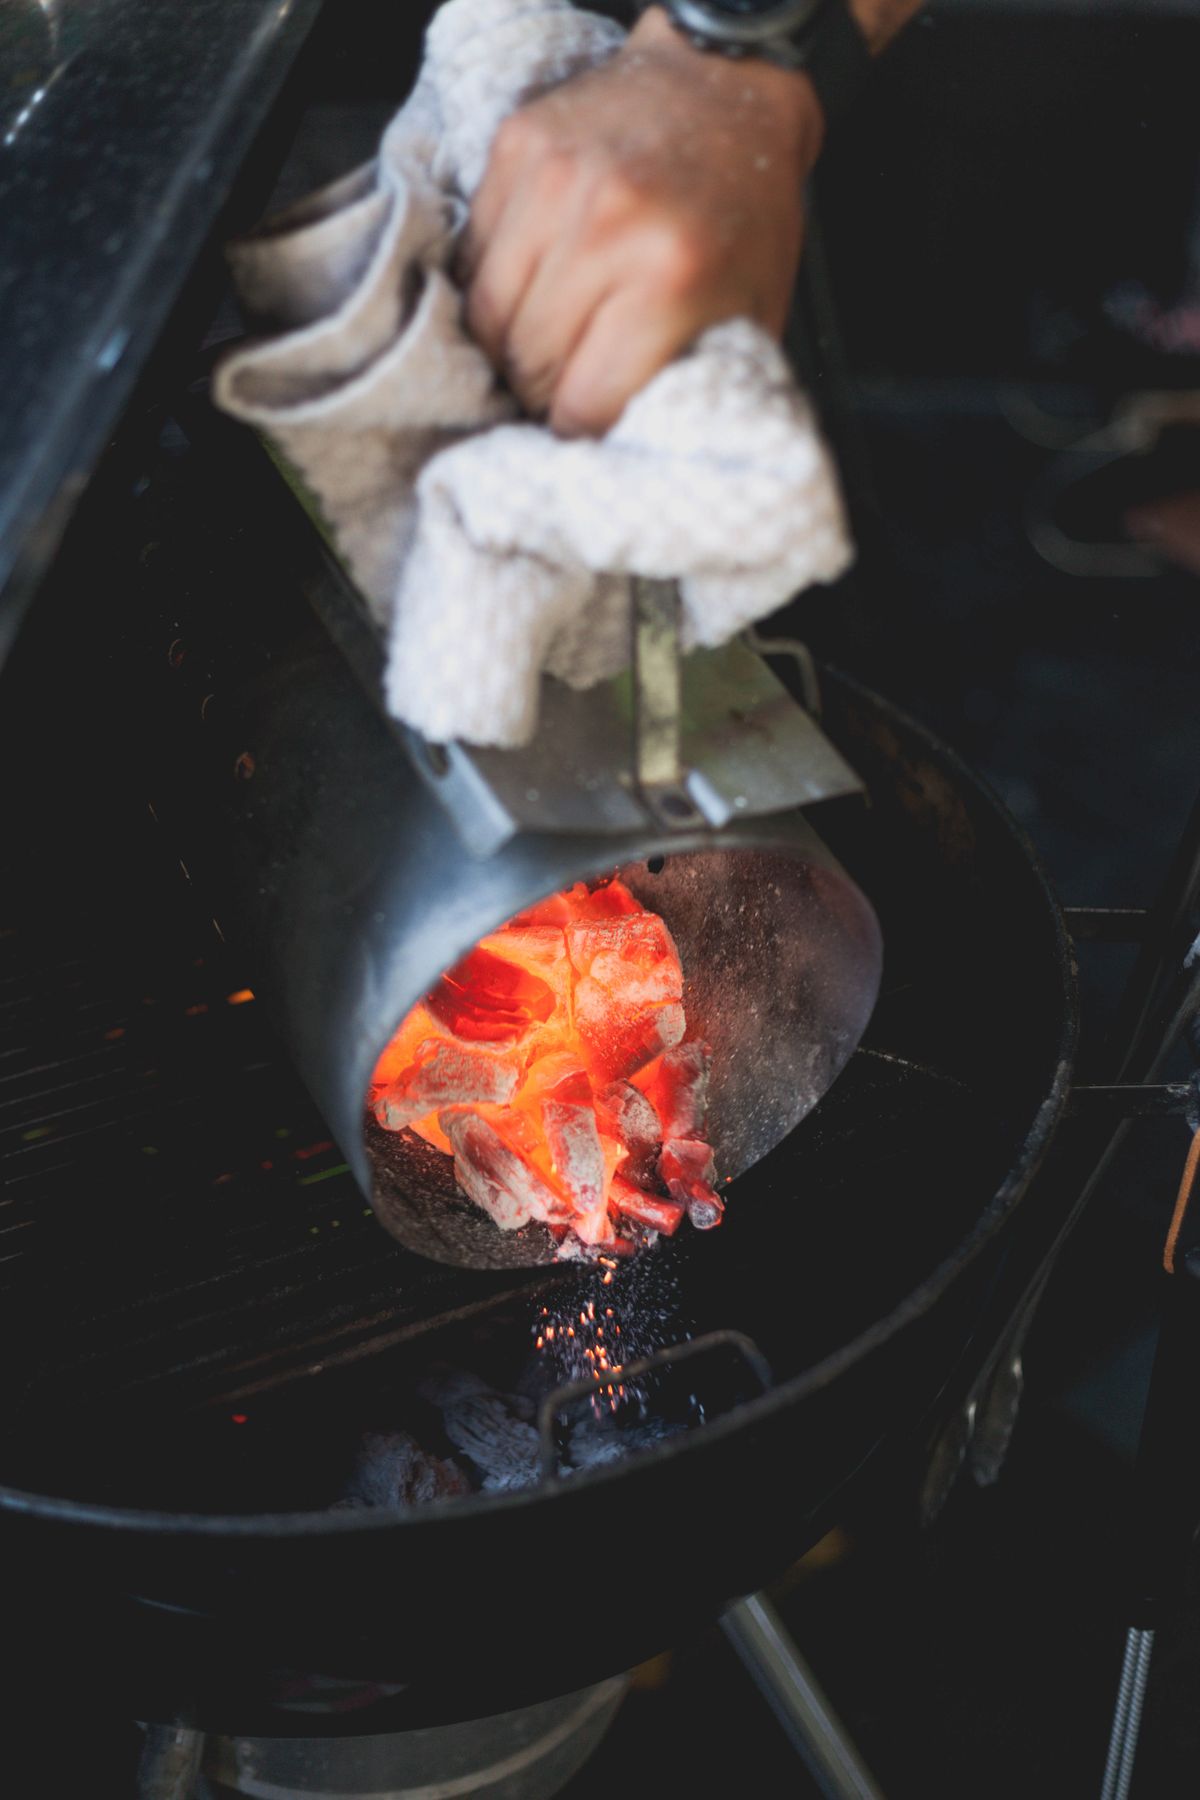
- Pour deliberately. Put on an appropriate heat-resistant barbecue mitt, keep people clear and pour into the chosen part of the charcoal grate. Set the empty chimney on a non-combustible surface or designated holder; the cylinder is still extremely hot. Refit the cooking grate and preheat the grill with the lid as your barbecue's instructions require.
Weber's guidance gives the 10–15 minute lighting window for its chimney, with the upper charcoal starting to turn grey; that is a useful point of reference, not a universal stopwatch setting. Don't hover over the top when checking it. A lit chimney throws out concentrated heat, and hot embers can move when you pour.
Keep this beside the barbecue
The chimney at a glance.
| Stage | What you're looking for | What to do |
|---|---|---|
| Ignition | Starter fuel burning below | Leave the chimney standing securely |
| Catch | Heat and flame rising; coals catching higher up | Don't disturb the fuel |
| Ready to pour | Top coals beginning to ash over and ignite | Wear a suitable mitt; pour with clear space |
| Preheat | Fuel arranged as intended, grate heating | Set lid and vents for the cook |
Appearance and timing vary by fuel, weather and cooker. Refer to your starter and grill instructions.
How much charcoal should you use?
This is where the internet will cheerfully give you a single exact answer for a dozen different barbecues. A 'full chimney' isn't a standard unit. Starters vary in capacity, briquettes differ in size and one grill can lose heat much faster than another.
For a short, hot cook — burgers, thin steaks, skewers — start with enough fuel to establish a useful direct-heat area that accommodates what you're cooking. Half a standard starter may be more useful than a brimful one. Remember that smaller coals can burn out sooner; the aim is a fire suited to the food, not a record for how much charcoal you can fit into a cylinder.
For a larger meal with several steaks or chicken pieces, you might want a more generous starter so the fire remains stable through batches. Plan the space before deciding on fuel. A roaring hot grill with nowhere to finish the thickest pieces indirectly is an avoidable problem.
For low-and-slow cooking, don't assume dumping a full chimney of fully lit fuel into the barbecue is the right method. Many charcoal cookers use a smaller number of lit coals to ignite a larger bed gradually, according to the manufacturer's instructions. A controlled burn is the purpose, and the fuel arrangement matters more than a dramatic initial temperature spike.
Keep a simple note after each cook: grill, weather, fuel, how much you lit, roughly how long useful heat lasted. Two or three ordinary cooks will tell you more about your particular setup than somebody else's hard-and-fast 'one chimney per meal' rule.
Pour it somewhere sensible.
There are times to spread coals evenly: an entire grill of food needing the same fierce direct heat, for instance. But as a default, two-zone cooking is more forgiving. Pour the lit charcoal to one side, leaving the other side without fuel beneath it. Brown the food over the coals; move it away when you need a quieter finish.
That clear side still heats up when the lid is closed. It isn't a cold plate where you can abandon food indefinitely. What it gives you is control. Your steak can develop colour without scorching while you finish the centre, and your chicken can spend part of its cook away from flare-ups.
How much space? Enough to move the whole batch, not just the one piece that catches fire first. If you can't fit everything on the indirect side, light a smaller fire or cook in batches. The extra grill space is only useful if you leave it empty.
After pouring, don't rush to throw food on immediately. Refit the grate, replace the lid and let the barbecue preheat. Learn how its vents influence the burn. Openings provide combustion air; closing them changes the supply, but temperature takes time to respond. Turning vents back and forth every thirty seconds produces confusion rather than control.
If the chimney refuses to cooperate.
Only the bottom pieces are burning. Check that the lower vents aren't blocked and that you used dry, suitable charcoal. Oversized lumpwood pieces can bridge the chamber and make lighting uneven. Don't pack everything down to 'help' it catch; airflow is what makes the system work.
The firelighter has burned out but the coals haven't caught. If the fuel is damp or the starter is overloaded with large pieces, a modest starter flame may not pass enough heat upwards. Let the equipment cool before rebuilding an unsuccessful setup. Don't squirt lighter fluid onto partially lit or hot charcoal.
It smokes heavily at first. Some smoke while the starter catches is normal. Poor-quality, damp or contaminated fuel can be worse. Choose charcoal sold for cooking and never substitute treated wood, construction offcuts or mystery bags from the shed.
The grill gets too hot once you pour. Next time use less fuel, create a smaller direct zone or adjust the cooker as its maker recommends. This is why it's worth planning the fire before lighting. More charcoal isn't a substitute for being able to move the food.
It seems to take forever in cold weather. Wind, moisture and fuel can all alter the process. Keep the chimney sheltered from excessive wind without enclosing it or restricting ventilation. Don't take it into a garage, conservatory or shed to 'help' it along. Charcoal produces carbon monoxide even when flames aren't obvious.
When the cook is over.
Close down and cool the barbecue exactly as its manufacturer requires. Never move hot coals into a household bin, and remember that ash can remain hot long after it looks harmless. A chimney starter is still a piece of fire equipment when it's empty: put it somewhere heatproof and out of everybody's way.
The best thing about a chimney is how quickly it becomes uninteresting. You light it, you pour the coals, and you get on with cooking. No tricks, no ritual of fanning the fire. The clever bit is remembering that starting the charcoal was only the beginning.